I finally got around to updating the ever-so-popular Overnight Duffel Bag Pattern. This bad is by far the most popular project on the blog. It has over 25000 impressions on Pinterest and I have received hundreds of emails requesting an updated version. I originally made this bag when I was just learning how to sew, so there were a few errors on the original post that needed to be corrected. I have made about 8 of these bags so far and I know the pattern and instructions work well. The pattern meant for someone that has some sewing skills and can understand the basic sewing lingo. It is not for a beginner. It is an evening or weekend project as it has quite a few parts to put together. The materials for this bag cost about $15 total.
This bag is perfect for an overnight trip to a friend’s house, for hospital baby delivery and even as a shopping bag. You can mix and match your favorite fabrics to create a piece you can cherish for years to come. It is sturdy, can be washed and holds quite a bit; measuring 12″ high x 15″ wide.
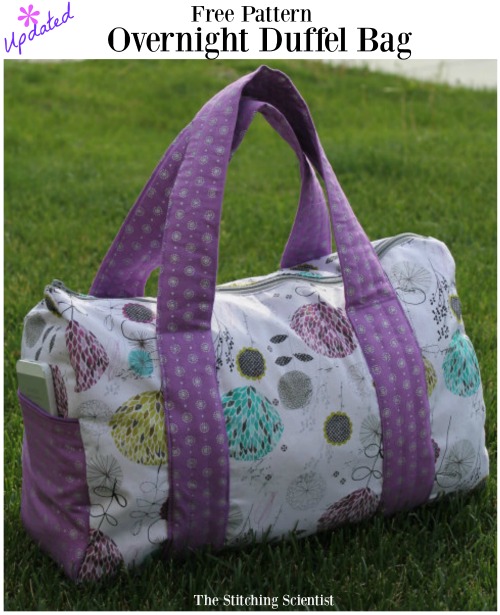
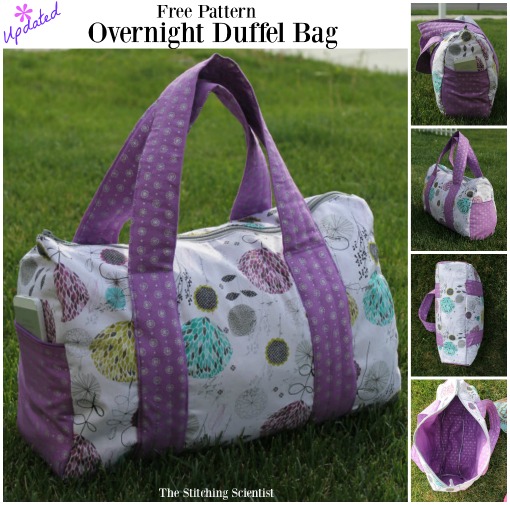
Here is the original bag I did 2 years ago that everyone was having issues downloading. Still one of my favorites! My best friend used this bag for her hospital visit when she was having her first baby. I love the purple combinations.
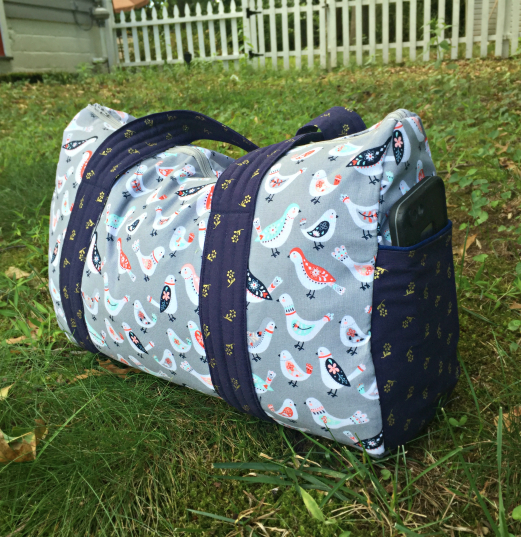
Here is another one I did. For this one, I made the straps a bit longer and less stiff than the first. I found this bird fabric from my local fabric store. Isn’t it so cute, paired with the navy blue? The side pocket is so convenient too for keys or phone.
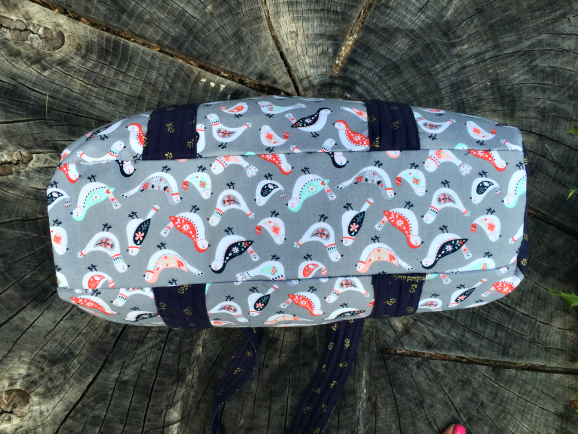
The bottom of this bag is flat and stiff, making it study. It can stand along without rolling over.
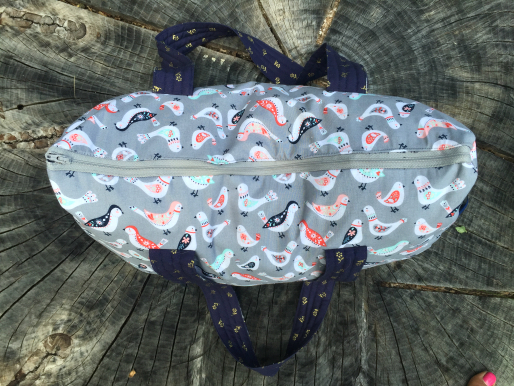
The closure is a standard zipper. It is easy to open and close. I think maybe an open-coil zipper may work better. I also need to get a cute zipper pull to accent it!
Well, there you have it! Show me yours via Facebook.
You download the FREE PATTERN with full detailed instructions HERE. Good luck.
Thanks for visiting and Happy Sewing!
NewToSewing · 446 weeks ago
Judy · 446 weeks ago
Sheila Morabito · 446 weeks ago
stitchscientist 55p · 446 weeks ago
Fanya Houston · 446 weeks ago
stitchscientist 55p · 446 weeks ago
Joyce Machado · 445 weeks ago
Sue · 444 weeks ago
Beulah · 435 weeks ago
I certainly wouldn't teach my granddaughter to sew this way. I will be sticking to my tried and true way of doing things.
Rose Palazzolo · 393 weeks ago
Luella Reynolds · 442 weeks ago
The pattern says to cut interfacing 1" smaller. When sewing the lining and the main fabric together do you hit the interfacing or just sew close to it?
Sanawar990 · 440 weeks ago
joanne · 329 weeks ago
Linda · 395 weeks ago
Thanks so much!
Jeannette · 392 weeks ago
johnsmith · 373 weeks ago
top playground tiles service. playground tiles services
joanne · 329 weeks ago
Jean · 349 weeks ago
Debbie · 331 weeks ago
Becky · 330 weeks ago
Mariah Fakename · 220 weeks ago
Caroline · 183 weeks ago
Liz · 133 weeks ago
Rachel · 114 weeks ago
1) I am uncertain why the owner of this blog does not address any of these comments herself; that reflects poorly, for sure. But -- maybe its a dead site and she is not even active anymore(?)
2) I am a comfortable sewist. I've been sewing for about 8 years and am confident and comfortable with everything from toys, to bespoke clothing to pet beds and odds-and-ends. I can use PDF patterns with ease, can use big box patterns just fine, etc. This thing was simple. I really can't see how so many "I am an advanced sewist!!" people are so baffled by this pattern. Its perfectly fine; simple and FAST. I've never tackled a bag before, so I was a bit skeptical -- but it was start-to-finish like a 2 hour project (including cutting time). The instructions are fine for the most part.
3) THERE IS NO SEAM ALLOWANCE in the instructions. At all. None. Bizarre, but I would assume this person just made the mistake of leaving that off. Some of the descriptions are also confusing; but luckily they included pictures and those are easy to follow, too. I used a 3/4" seam allowance and my bags finished measurements are: 17.5 (long) x 6" (wide) x 10" (tall).
I also used one-sided fusible fleece instead of batting and I found that worked great and resulted in a bag that can easily stand on its own.
I hope this helps someone,.