• Home
  • About Me
  • Tutorials
    • Bags
    • Children
    • Women
    • Home
  • Free Sewing Patterns
    • Bags
    • Children
    • Women
    • Quilts
    • Home
  • Shop
    • Sale
    • Essentials
    • Flash Sale
    • Kits
    • Sewing Gifts
    • Pre-cut Fabric
    • Sewing Patterns
  • Roundup
  • Contact

The Stitching Scientist

    Free Yoga Mat Bag Sewing Pattern

    Accessories· Bags· Free Pattern

    15 Jan

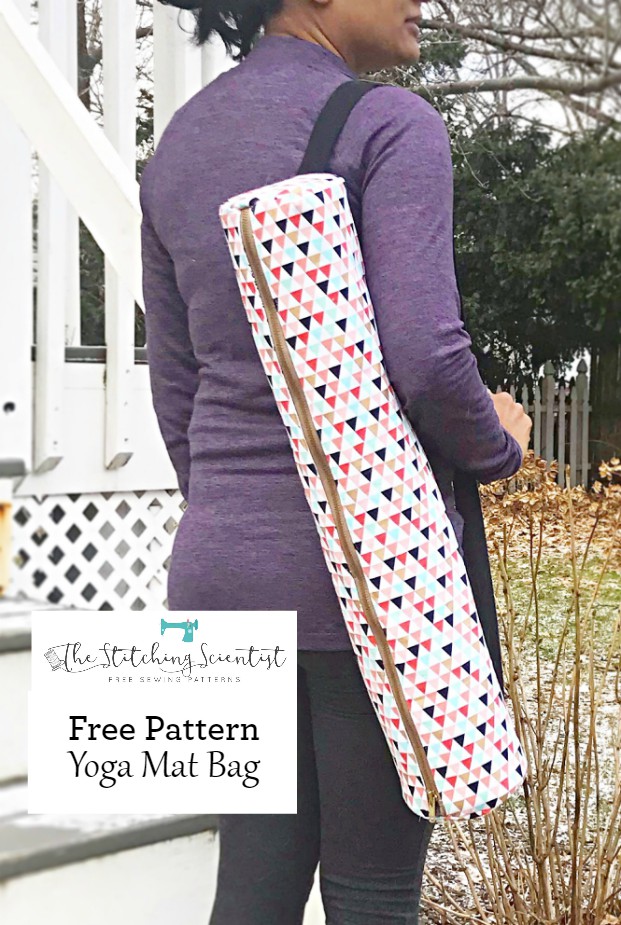
    Hello Everyone! So, in my effort to sew a new pattern every month, I am starting off with this Free Yoga Mat Bag Sewing Pattern. This is an absolutely easy beginner friendly bag to carry your yoga mat to and from class. My daughter recently started yoga and requested a bag for her mat. To be honest, I scanned the online community for a free pattern but could only find ones with open tops. I like the idea of the zipper since its easier to get the mat into the bag through the side than through the top. I think it also looks a bit more stylish. The tutorial covers the bag for a standard size adult yoga mat (68″x 24″) but can be easily adjusted to your desired dimensions.

    yoga mat pattern

    I got this fabric from Hobby Lobby. I have been waiting for the perfect project for it and this is definitely it! I absolutely love how this turned out. The bag is a bit long as it had to be made wider than the mat so that it can fit withe the zipper.

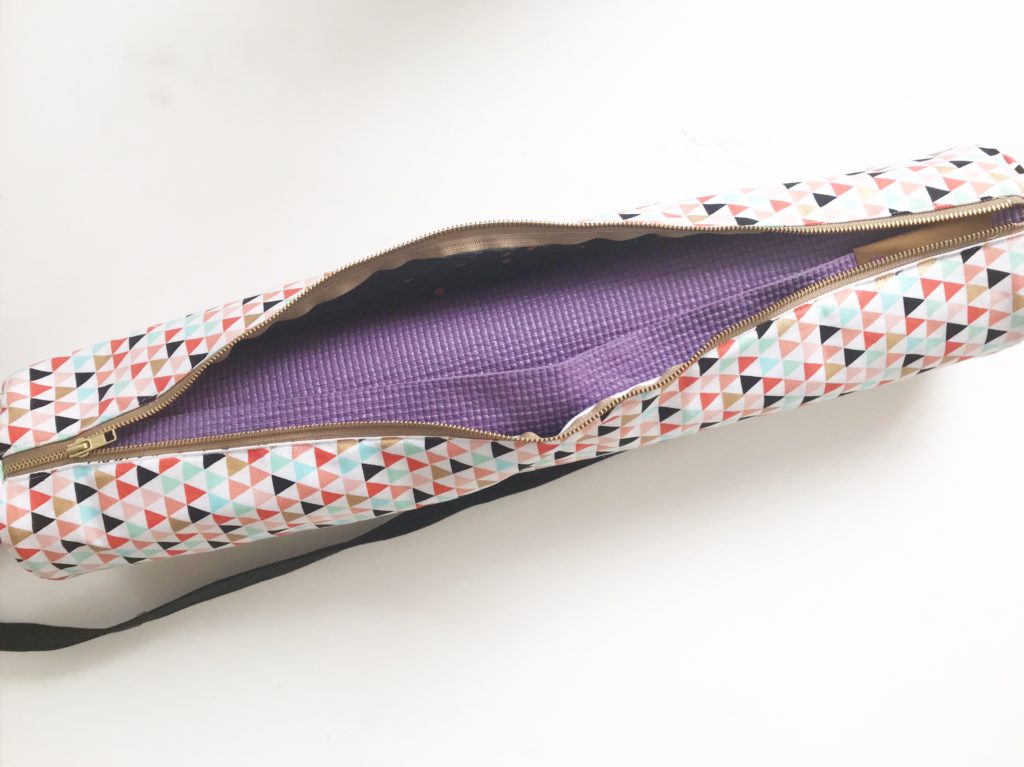
    It opens up nicely for easy entry. I also made it with a wider than normal opening so that there isn’t a struggle to fold the mat tightly to have it fit. A loose fold will still fit comfortably inside the bag. This actually reminds me of the Quilted Barrel Pouch I made a few years ago. This Free Yoga Mat Bag Sewing Pattern is bigger variation of a small barrel bag.

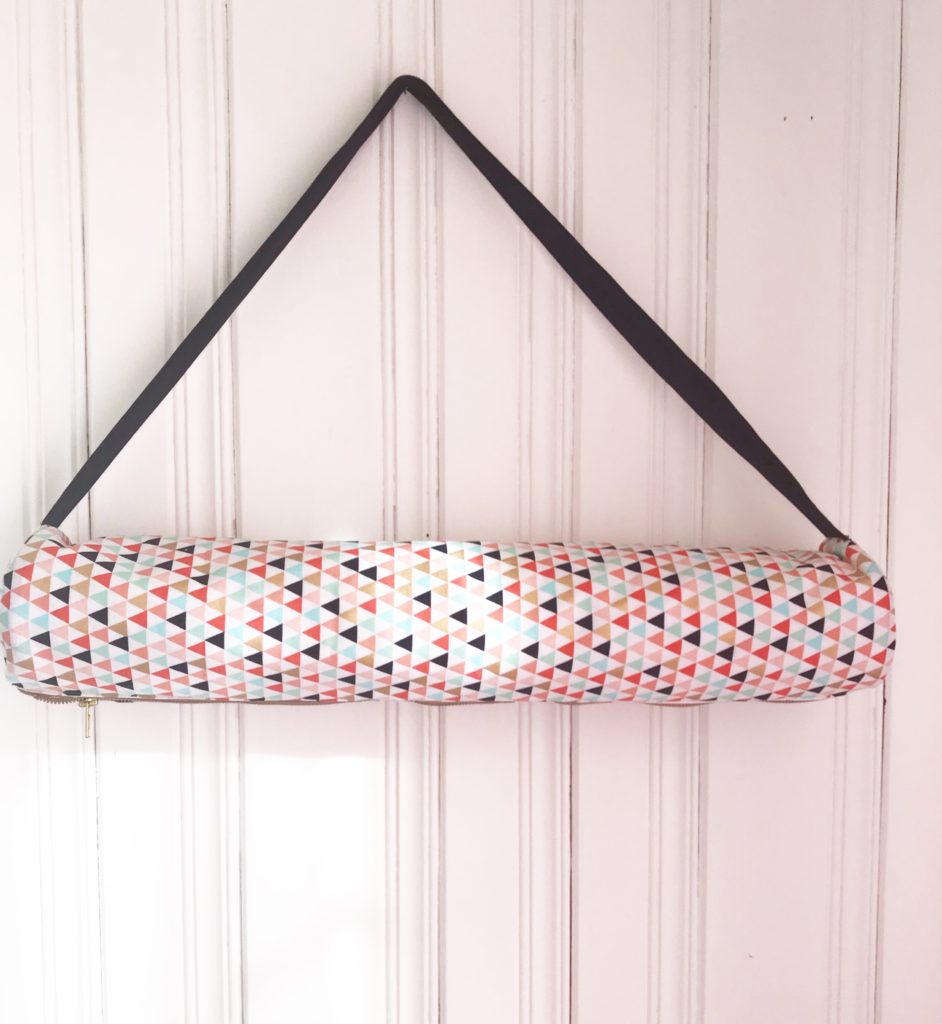
    The bag can also be used like a standard shoulder bag instead of a sling. Either way, it looks fabulous:-) Sorry for the tons of pictures. I could not decide which one to use and loved them all.

    Free Yoga Mat Bag Sewing Pattern Supplies

    1 zipper measuring at least 30″
    1/4 yard outer fabric
    1/4 yard lining fabric
    1/4 yard fleece interfacing
    3″ strip of canvas

    Step 1- Measure and Cut

    For a standard yoga mat of 68″ long x 24″ wide, you need the following pieces:

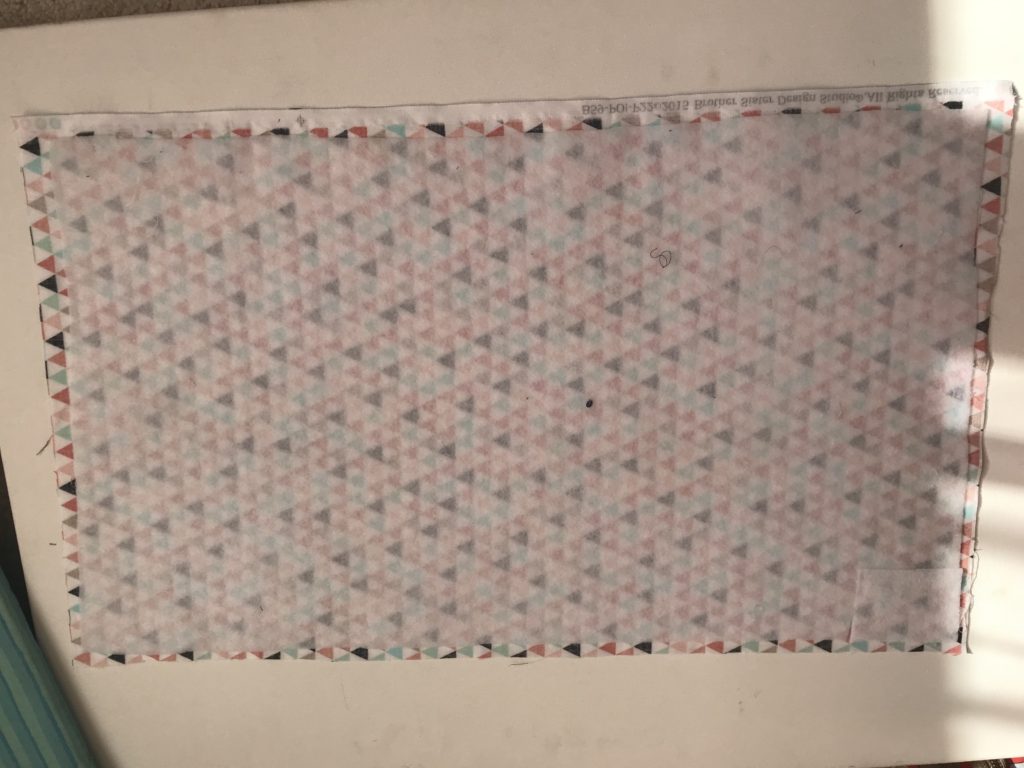
    29″ x 17.5″ rectangle of outer fabric. This is essentially Width of yoga mat PLUS 5 inches x 17.5.
    29″ x 17.5″ rectangle of lining fabric.
    29″ x 17.5″ rectangle of fusible fleece interfacing.
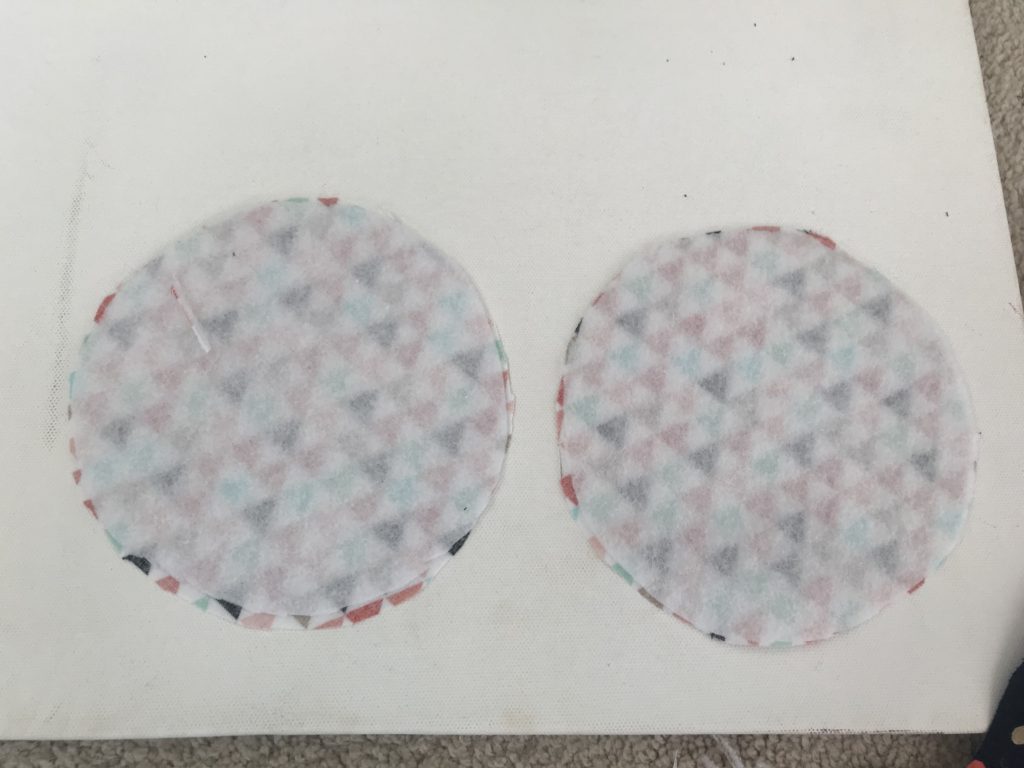
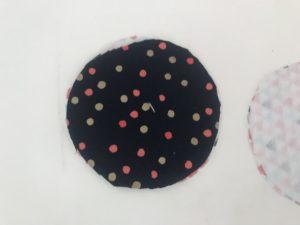
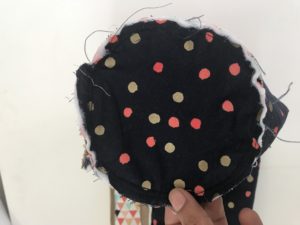
    2 Circles with 6.5″ diameter of outer fabric. You can download one HERE
    2 Circles with 6.5″ diameter of lining fabric.
    2 Circles with 6.5″ diameter of fusible fleece interfacing fabric.
    Strip of canvas measuring 3″ wide x 35″ long.The length is about 11″ more than the width of the mat.

    Step 2- Prepare Pieces

    Iron on the interfacing to the wrong side of all the outer fabric pieces; 1 to the main piece, 1 to one of the side circles and 1 to the other side circle.
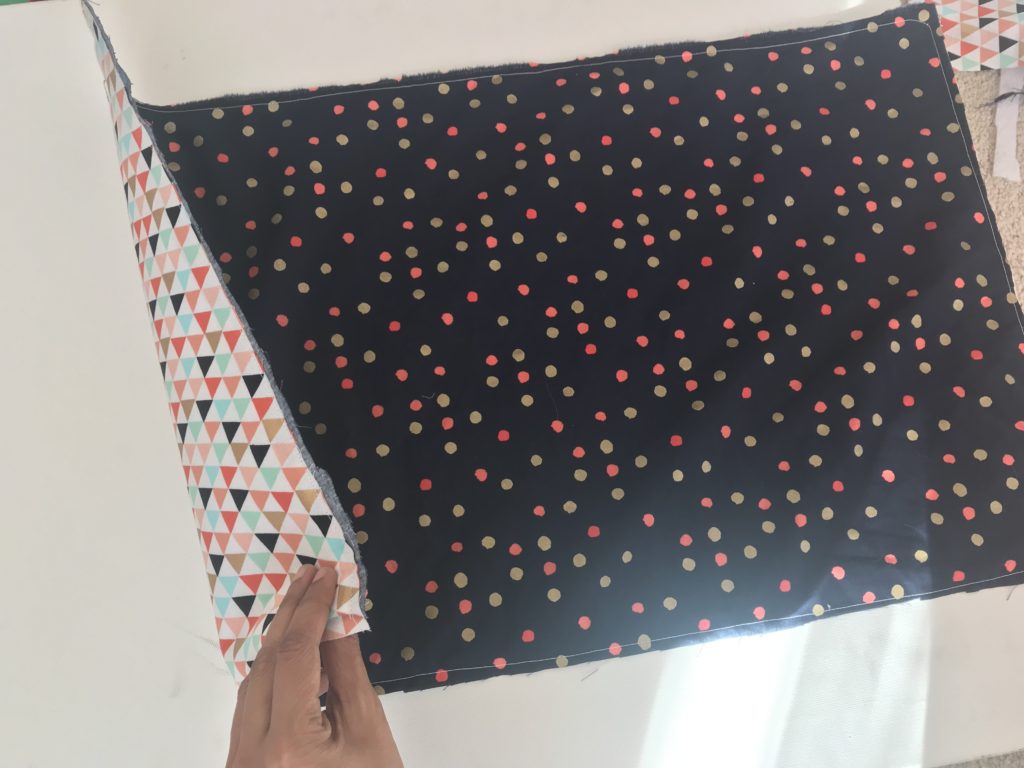
    Next, take the lining fabrics and place over the interfacing side that you just ironed on for each of your 3 pieces. Baste stitch in place.
    For the canvas strip, fold in the long side about 1/4″ on both sides, iron down. Then fold in center and sew ends closed.

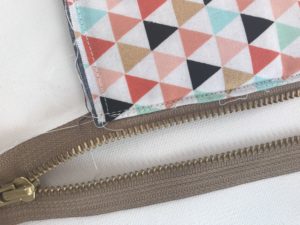
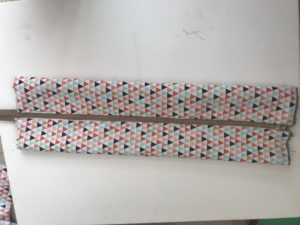
    Step 3- Attach Zipper

    Here is the fun part! Fold in the long ends of your main piece about 1/4″. Iron down. Pin zipper under the fold. Using a zipper foot, sew down. Sew the zipper close, just about a few mm’s away from the fabric. Repeat for the other side of the fabric and other side of the zipper. Cut out extra zipper if your zipper is longer than the fabric. Sew secure stitches where you cut the zipper so that it still closes. Go slow so that you don’t break your needle.

    Step 4-Attach Strap

    Center up the zipper and pin the ends of the strap on the top of the opposite side of the zipper.
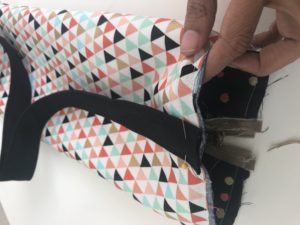
    Yoga Mat Bag Pattern

    Step 5-Attach Ends

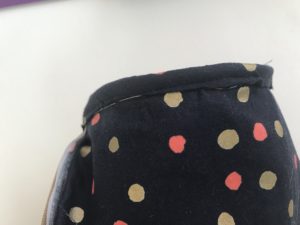
    Turn the bag inside out (lining facing out) and open the zipper. Take one of your circles and pin to the end, right side together. Sew all the way around using 3/8″ seam allowance. Repeat for the other side.Turn the bag inside out and either zig-zag the raw edges or add binding to cover.

    Well, there you have it! Hope you guys use the Free Yoga Mat Bag Sewing Pattern and whip up one of these beauties for yourself or friend.

    Thanks for visiting and happy sewing!

    « New Year New Goals
    DIY Valentine’s Day Table Runner »
    Close
    Forgot password?
    Send me my password!

    Close message

    Login
    • This blog post
    • All blog posts

    Subscribe to this blog post's comments through...

    • Add to netvibes
    • Add to My Yahoo!
    • Add to Google
    • Add to Microsoft Live

    RSS Icon RSS Feed

    Subscribe via email

    Subscribe

    Subscribe to this blog's comments through...

    • Add to netvibes
    • Add to My Yahoo!
    • Add to Google
    • Add to Microsoft Live

    RSS Icon RSS Feed

    Subscribe via email

    Subscribe
    Follow the discussion

    Comments (20)

    Loading... Logging you in...
    Close

    Login to IntenseDebate

    Or create an account

    Forgot login?

    Cancel Login
    Close WordPress.com

    Lost your password?

    Cancel Login
    Dashboard | Edit profile | Logout
    • Logged in as

    Admin Options

    Save Settings

    Sort by: Date Rating Last Activity

    Loading comments...
    +2 Vote up Vote down
    Gail Pickens-Barger's avatar

    Gail Pickens-Barger · 335 weeks ago

    Love it. Pinned to my Yoga Props pinterest page and on my yoga with gaileee facebook page!!
    Reply
    1 reply · active 334 weeks ago
    Loading...
    0 Vote up Vote down
    stitchscientist's avatar - Go to profile

    stitchscientist 55p · 334 weeks ago

    Thank you so much for your support
    Reply
    +1 Vote up Vote down
    judy mazzari's avatar

    judy mazzari · 335 weeks ago

    thank you very much
    Reply
    0 replies · active 335 weeks ago
    +1 Vote up Vote down
    High blood pressure's avatar - Go to profile

    High blood pressure · 334 weeks ago

    It's really wonderful.
    Reply
    0 replies · active 334 weeks ago
    +1 Vote up Vote down
    CRICKET WORLD's avatar - Go to profile

    CRICKET WORLD · 334 weeks ago

    Good Job Admin
    Reply
    0 replies · active 334 weeks ago
    Loading...
    +3 Vote up Vote down
    lovequotesez's avatar - Go to profile

    lovequotesez 26p · 334 weeks ago

    Thank you for sharing the sewing pattern!
    yahoo mail login
    Reply
    1 reply · active 334 weeks ago
    Loading...
    +2 Vote up Vote down
    stitchscientist's avatar - Go to profile

    stitchscientist 55p · 334 weeks ago

    Thank you so much for visiting
    Reply
    +1 Vote up Vote down
    vintagenira's avatar

    vintagenira · 334 weeks ago

    thank you so much for sharing this! love that you added a fun lining inside as well
    Reply
    1 reply · active 334 weeks ago
    Loading...
    +1 Vote up Vote down
    stitchscientist's avatar - Go to profile

    stitchscientist 55p · 334 weeks ago

    Thanks so much for your kind words
    Reply
    0 Vote up Vote down
    June's avatar

    June · 332 weeks ago

    Thank you so much for sharing such a wonderful pattern

    I see a second Wonderful use for this- as a project for homeless people to be able to carry a blanket inside - or a thin mat. I believe everything in life holds a second Blessing - Thank you.
    Reply
    0 replies · active 332 weeks ago
    0 Vote up Vote down
    Kate's avatar

    Kate · 323 weeks ago

    Thank for the tutorial. I just made it and love it. I'm glad I bought 1/2 yard of each fabric. With shrinkage and how the fabric was cut at the store, it was just right. Otherwise, perfect directions, especially for a newbie like me. Thanks again.
    Reply
    0 replies · active 323 weeks ago
    0 Vote up Vote down
    xem tuoi vo chong's avatar - Go to profile

    xem tuoi vo chong · 320 weeks ago

    Read more at dich vu ke toan tron goi
    Read more at cong ty dich vu ke toan
    Read more at thanh lap cong ty co phan
    Reply
    0 replies · active 320 weeks ago
    0 Vote up Vote down
    Colleen Paton's avatar

    Colleen Paton · 311 weeks ago

    Thanks for the tutorial..it came right as I was thinking about having to make one to carry my mat as it's a bit cumbersome and heavy. One thing I am having difficulty with is that under the instructions above where the material requirements and cuts are listed, the "HERE" for click here to get the circles is not linked to anything?? How do I get the circle pattern??
    Reply
    0 replies · active 311 weeks ago
    0 Vote up Vote down
    Paige's avatar

    Paige · 310 weeks ago

    Just to note - I think your list of fabric requirements is off - 1/4 yard is only 9 ' wide x WOF - there is no way to get a panel 17.5 x 29 out of a 1/4 yard.
    Reply
    0 replies · active 310 weeks ago
    0 Vote up Vote down
    Perry's avatar - Go to profile

    Perry · 309 weeks ago

    I just completed making your pack and generally, your instructional exercise was anything but difficult to pursue. Be that as it may, your bearings expect the individual making the pack has some kind of sewing skill. An amateur would experience issues putting in the zipper. I thought that it was hard to put in the zipper. I seasoned the zipper into the covering first, which I believe is simpler than the bearings you gave. You can then effectively remove the overabundance zipper. Generally, I truly appreciated making your example. A debt of gratitude is in order for your commitment. https://omshivaloka.com/
    Reply
    0 replies · active 309 weeks ago
    0 Vote up Vote down
    Jodi's avatar

    Jodi · 280 weeks ago

    I am hoping to adapt your pattern for something completely different. My husband recently had to start using catheters. In our bathroom is now this long, skinny, awkward box to store. I am hoping to adapt this so I can hang it from our towel rack. It will certainly be prettier to look at and keep the cats from chewing the box! Also kind of excited to have a reason to sew again, think I might have to make a regular thing of that!
    Reply
    0 replies · active 280 weeks ago
    +1 Vote up Vote down
    Darlene's avatar

    Darlene · 277 weeks ago

    Thank you for this lovely pattern. Hopefully I can get the zippers in this tiny town I live in. My niece and her hubby will love this. You are kind to share this lovely pattern.
    Darlene
    Reply
    0 replies · active 277 weeks ago
    0 Vote up Vote down
    dawn's avatar

    dawn · 273 weeks ago

    what do you mean by 29"x17.5" plus 5"
    Reply
    0 replies · active 273 weeks ago
    Loading...
    +1 Vote up Vote down
    trish513's avatar - Go to profile

    trish513 1p · 258 weeks ago

    Thanks for the pattern! Looks like you need a half yard of the main fabric and lining fabric and fleece, not a quarter yard. You may want to update the pattern in case someone buys fabric for it before reading the cutting instructions.
    Reply
    0 replies · active 258 weeks ago
    Loading...
    0 Vote up Vote down
    favaxe's avatar - Go to profile

    favaxe 11p · 218 weeks ago

    Thanks for the amazing post hotmail sign up I am sure its the best
    Reply
    0 replies · active 218 weeks ago

    Post a new comment

      Comment as a Guest, or login:

      • Login to IntenseDebate
      • Login to WordPress.com
      Go back

      Displayed next to your comments.

      Not displayed publicly.

      If you have a website, link to it here.

      Posting anonymously.

      Submit Comment
      Thank you so much for taking the time to comment on this post! Please visit us again.

      Comments by IntenseDebate

        Reply as a Guest, or login:

        • Login to IntenseDebate
        • Login to WordPress.com
        Go back

        Displayed next to your comments.

        Not displayed publicly.

        If you have a website, link to it here.

        Posting anonymously.

        Cancel Submit Comment
        Loading Loading IntenseDebate Comments...


        Welcome

        Hi there! Thanks for visiting my creative corner. I am a DIY enthusiast and single mom to a little girl and a slobbering dog. I enjoy my full time job as a research scientist during the week but like to experiment on sewing and crafty projects on the weekends. Join me as we explore the beautiful world of fabrics together. Read More…

        Craftsy

        Fat Quarter Shop Quilting Fabrics and Supplies

        • Home
        • About Me
        • Tutorials
        • Free Sewing Patterns
        • Shop
        • Roundup
        • Contact

        Copyright © 2025 · Refined theme by Restored 316