**This post contains affiliate links.**
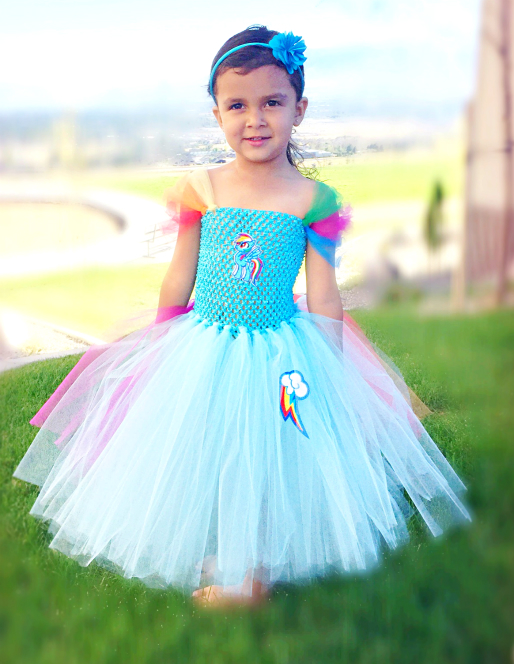
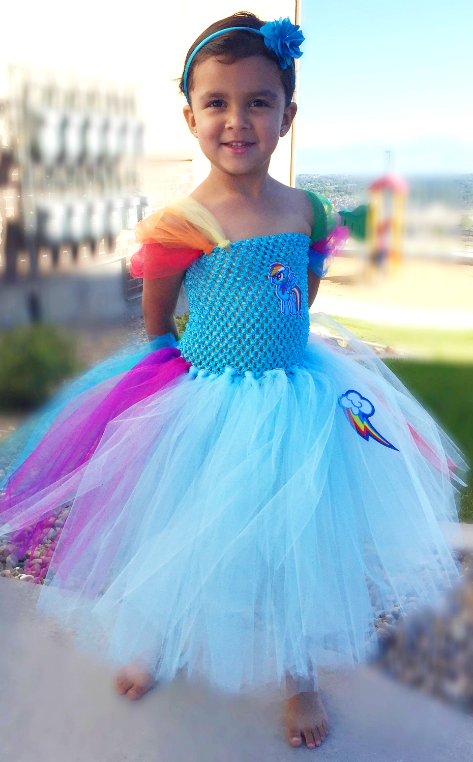
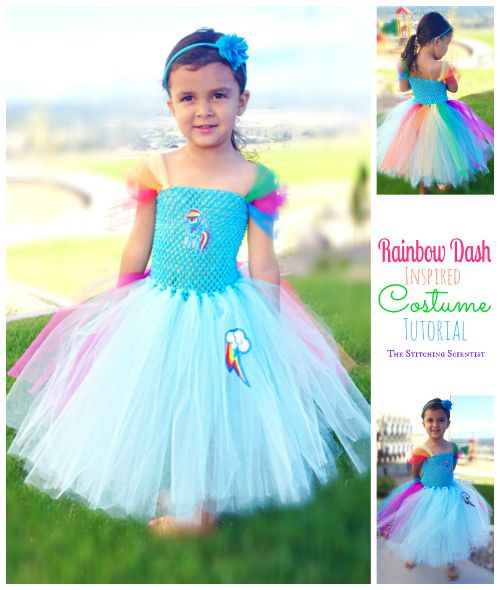
My 4 year old is obsessed with everything My Little Pony. Her favorite is Rainbow Dash. So, off course when I asked her what she wanted to be for Halloween this year, she said Rainbow Dash. Well, here is my attempt at creating something inspired by My Little Pony Rainbow Dash. This Rainbow Dash Costume Tutorial does not require sewing. It is extremely easy to create and can be done with your child. Mila and I had loads fun cutting and putting this together. We did it in one night while watching a few episodes of My Little Pony:-). I saw these on Etsy for about $70 and refused to pay that much for it. The entire outfit excluding the iron on patches cost about $20 to make with lots and lots of extra tulle to use on other projects! I hope it is not too cold on Halloween this year so she can actually wear this as is. If not, we will style it up with a cute blue sweater and some leggings. Hope you guys enjoy the tutorial.
I cheated a bit with this tutorial by using tulle that is on a roll! This particular light baby blue was the perfect match for Rainbow Dash. Yep, I did not know until now that that even existed. The rolls come 6″ wide so all you have to do is roll and cut the length. I cannot stress to you how much time this saved us. As you know tulle is not the easiest thing to work with so having it semi precut was perfect! I bought a pack of rainbow colored tulle and some sky blue colored tulle and went to work! We have lots of tulle left over to create more tullelious creations.
I bought some iron on Rainbow Dash patches to use the cutie mark and on the front. These are optional but my daughter loved them.
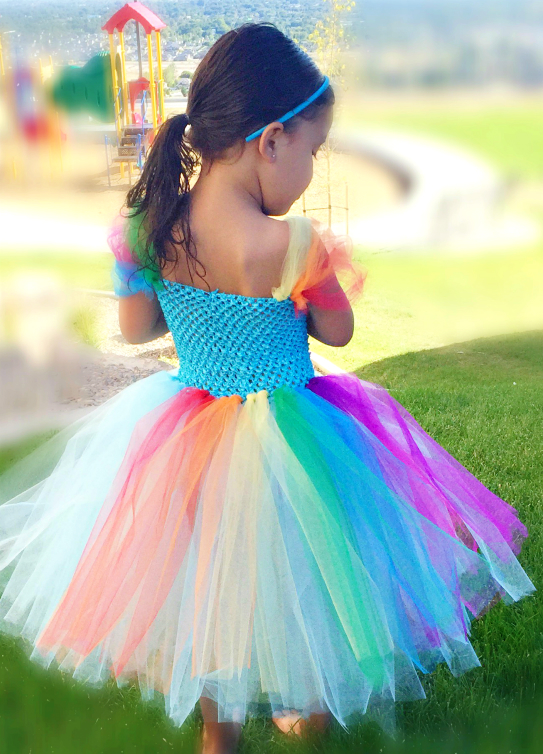
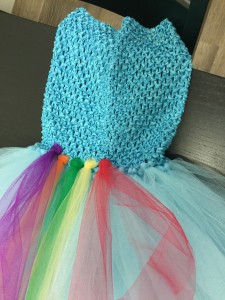
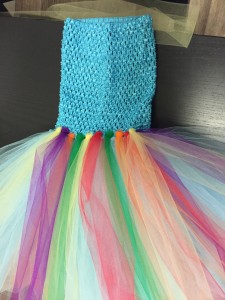
I decided to try to make the costume as close to the actual Rainbow Dash character as possible. We did not want to use rainbow colored tulle all over the skirt as the character only has it on the back. I really love how the back turned out.
Your Supplies
- Blue tulle Roll (100 yards)
- Rainbow colored tulle pack or 3 yards of each individual rainbow color tulle.
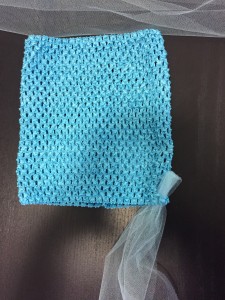
- One elastic crochet tube top in turquoise
- Rainbow Dash Patch (optional)
- Rainbow Dash Cutie Mark Patch (optional)
Measure how long you want the skirt part of the costume to be. Multiply that by 2 and add 1″ to get the measurement of the tulle strips you need to cut. Start out by cutting about 50 strips measuring about 6″ wide x that length measurement you did earlier. You may need more strips depend on how full you want the skirt.
Step 1
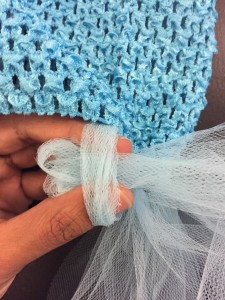
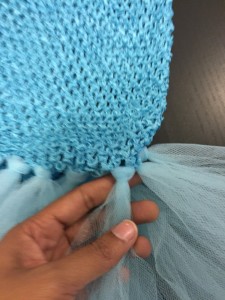
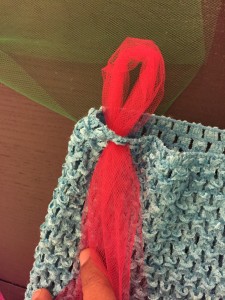
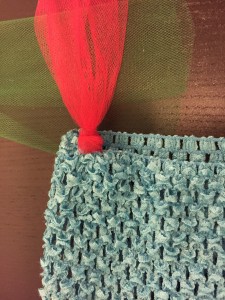
Take strip and fold it in half. Pass it through the last hole on the bottom side of the top.
Take the bottom of the strop and pass it through the center of the folded top of the strip.
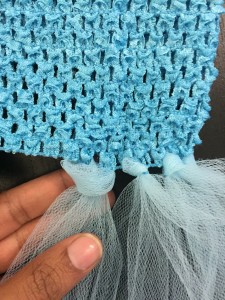
Pull down gently and tightly.
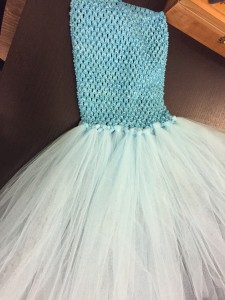
Repeat until you have it full all around the bottom row on the top.
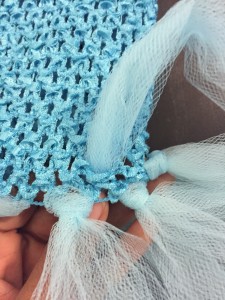
Next, you will move up to the second row on the top. I followed this tutorial on how to get my placement correct. It pretty much states that you do a strip in every other hole on the top.
For the third row, you will need to put in your colored tulle at the back. I centered mine and did about 2 strips for each color. Make sure you follow the rainbow pattern. I had to redo mine after I realize that the color layout was not that of a rainbow.
So, now you should have 3 rows of tulle. You can keep going and add another row if you want it fuller. I think the 3 rows was perfect for us.
Let’s move on to the sleeve part. There are lots of ways to do this but this is what worked best for me.
Measure your child from under arm to under arm, multiply that by 2 and add about 2″. Cut about 6 strips of this measurement of desired colors.
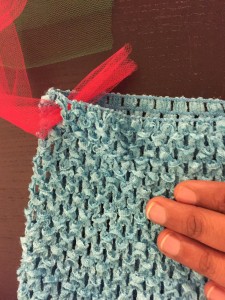
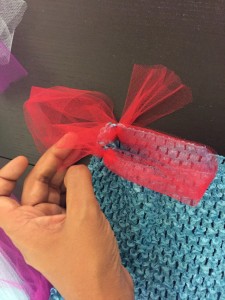
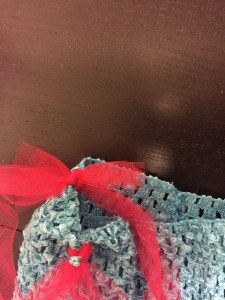
Fold in half and pass it though about 2 holes from the side of the top. Form a loop like you did for the skirt.
Now, take 1 of the 2 ends and pass it through the corresponding hole from the front on the back of the top. Take the other end and pass it through the back of the top. So, one end is going in through the front and the other end through the back on the same hole. Tie a knot with the two ends to secure it.
Repeat this doing about 3 straps for each arm. Trim off the excess and your sleeves are done.
That’s it! Have fun in your new costume.
Thanks got visiting and Happy Sewing,
